

Project Overview
Hi Friends, today I would like to share a very interesting IOT project with you. It is titled “ How to make a Raspberry PI Security and Surveillance System- IoT Security“. In this project, you will learn how to build a motion detection camera that you will be able to use as a camera trap, a pet/baby monitor, a security camera, and much more. The best part of this project is that its remotely controlled via IOT and you also learn basic Image processing through it.
PART 1
Project Architecture

This IoT Project mainly comprises of four sections :
-
- Section 1 -Image Capturing
- Section 2 – Micro-controller and Internet gateway
- Section 3 – Image Processing and Intrusion Detection
- Section 4 -Web Dashboard and Mail Alerts
** Part 1 Blog contains Section 1 and Section 2
** Part 2 Blog contains Section 3 and Section 4
Section 1 -Image Capturing
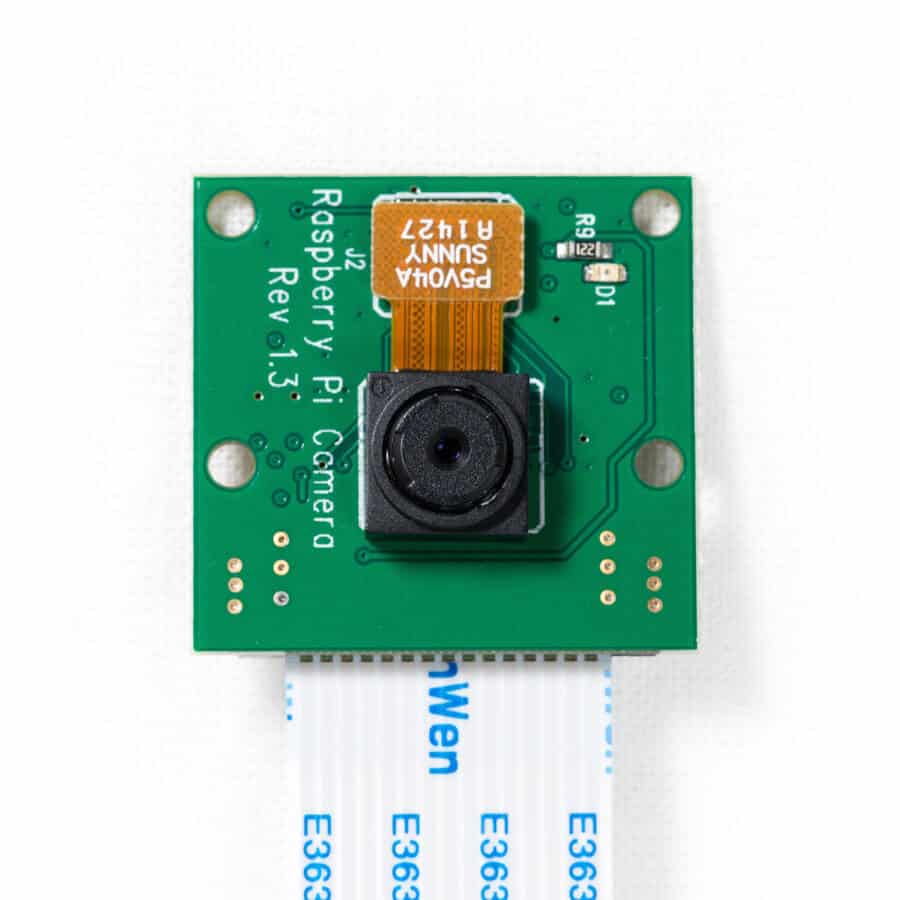
The system starts from a Raspberry Pi Camera , will captures the video for surveillance.
The Pi cam boasts an IMX219 and the Exmor R back-illuminated sensor architecture with superior image quality, colour fidelity, and low-light performance. It supports 1080p30, 720p60 and VGA90 video modes, as well as still capture. It attaches via a 15cm ribbon cable to the CSI port on the Raspberry Pi.The camera works with all models of Raspberry Pi 1, 2, and 3. It can be accessed through the MMAL and V4L APIs, and there are numerous third-party libraries built for it, including the Picamera Python library.
Usage
The Pi Cam is connected to the Raspberry Pi , which uses Pi-camera Python library to access the Pi Cam and control it. We will learn more the the different python libraries used for camear access and image processing in section 2
Section 2 -Micro-controller and Internet gateway
The second section comprises of Raspberry Pi 3.

The Raspberry Pi 3 Model B is a single-board computer with wireless LAN and Bluetooth connectivity.
Following are the special features of the RPi.
- Quad Core 1.2GHz Broadcom BCM2837 64bit CPU
- 1GB RAM
- BCM43438 wireless LAN and Bluetooth Low Energy (BLE) on board
- 100 Base Ethernet
- 40-pin extended GPIO
- 4 USB 2 ports
- 4 Pole stereo output and composite video port
- Full size HDMI
- CSI camera port for connecting a Raspberry Pi camera
- DSI display port for connecting a Raspberry Pi touchscreen display
- Micro SD port for loading your operating system and storing data
- Upgraded switched Micro USB power source up to 2.5A
The main tasks of Section 2 are listed below
- Setting Up the Raspberry Pi
-
SSHing Into the Raspberry PI
-
Email Our IP Address on Boot
Step 1: Setting Up the Raspberry Pi
To begin,we will follow the steps on the Raspberry Pi website on installing Raspbian Jessie on your MicroSd card, from here.
Once we have Raspbian installed on our Pi, it’s time to get some basic features set up.
WiFi
The first step to getting the most out of our Pi is to connect your it to the internet. We can quickly do it by clickingmay have completed this step already either by locating the WiFi symbol in the upper right corner of your Pi’s main screen and signing in there, or doing the same thing before installing Raspbian in the last step. If you are unable to sign in to your WiFi network from your Pi’s desktop interface, you can follow the instructions here to set up WiFi through the command line.
Step 2: SSHing Into Your PI
SSHing into your Raspberry Pi is easy and very useful, as the process allows you to issue commands to your Pi from any computer with nothing more than a WiFi connection.
To SSH into your Pi, you need to follow these 3 simple steps.
First, you need to enable SSH on your Pi. To do this, open up a command window in your Pi, and type in:
sudo raspi-config
This command allows you to enter a configuration menu, from there you will want to use the arrow, tab, and enter keys to go first into interfacing options, then to enable SSH, as well as the camera, then exit and reboot the pi.
Next, you’ll need to find your Pi’s IP address. In a command terminal, type:
sudo ifconfig
And your IP address should be in the wlan section that pops up, right under Link encap:ethernet. The IP Address will be like this eg. 192.168.1.10 .
Download & configure WinSCP
WinSCP can be downloaded here.
The first time you open WinSCP you will have a blank login area. Configuring is a simple as inserting all the specific details of the networked (server) Raspberry Pi as indicated below. Change the file protocol to SCP and leave the port to 22. Give it a name and Save.
By double clicking on the login name, WinSCP will open. After the first time the security key will be created upon acceptance. For Raspbian, the default username and password is pi and raspberry. You can create multiple saved logins.
In the future, if you want to change the settings, simply select the applicable login and Edit. After changing the settings remember to save it again.
From there, you should be good to go!
Step 3: Email Your IP Address on Boot
In this step we will focus on how to access your Raspberry Pi, regardless of the network you are on. Depending on the network, the Pi’s IP address changes. And if you do not have a monitor setup, you would need to ssh into the Pi to trigger the motion detection protocol, change motion preferences, or access anything else on the device. To solve this problem we will write a python script that emails us the Pi’s IP current IP address upon start up. The python script is as follows and was stored in an directory marked “background”.
#start in home directory
cd ~
#create background folder
mkdir background
#create python script
sudo nano emailip.py
#write in emailip.py
import socket
s = socket.socket(socket.AF_INET, socket.SOCK_DGRAM)
s.connect((“8.8.8.8”, 80))
print(s.getsockname()[0])
x = s.getsockname()[0]s.close()
import smtplib
from email.MIMEMultipart import MIMEMultipart
from email.MIMEText import MIMEText
fromaddr = “YOUR ADDRESS”
toaddr = “RECEIVING ADDRESS”
msg = MIMEMultipart()
msg[‘From’] = fromaddr
msg[‘To’] = toaddr
msg[‘Subject’] = “IP Address”
body = x
msg.attach(MIMEText(body, ‘plain’))
server = smtplib.SMTP(‘smtp.gmail.com’, 587)
server.starttls()
server.login(fromaddr, “YOUR PASSWORD”)
text = msg.as_string()
server.sendmail(fromaddr, toaddr, text)
server.quit()
Now to run the code on Reboot ,you have to follow one of the two step provide
( note: You should follow both to be on the safer side)
STEP A:
sudo nano /etc/rc.local
#enter in /etc/rc.local
while ! /sbin/ifconfig wlan0 | grep -q ‘inet addr:[0-9]’;
do sleep 3
done
_IP=$(hostname -I) || true
if [ “$_IP” ]; then
printf “My IP address is %sn” “$_IP”
python /home/pi/Background/emailip.py &
fi
exit 0
STEP B:
Run crontab with the -e flag to edit the cron table:
crontab -e
Add this line the file which has opened
@reboot python /home/pi/background/emailip.py &
#and you’re done.
This ends section 2 of the Part 1 of this project.
For Section 3 – Image Processing and Intrusion Detection and Section 4 -Web Dashboard and Mail Alerts ,Please check Part 2 of this Project at
How to make a Raspberry PI Security and Surveillance System- IoT Security-PART 2